
Veeam Backup for Microsoft Office 365 RESTful API: Creating your infrastructure
In part 1, I explained the basics on how to work with the RESTful API from getting familiar with REST as well as performing our first login and get some basic information. Now you’re used to this and saw how to get information out, we will start with the next step: creating and increasing your VBO infrastructure. You will learn how to:
- Create a new proxy
- Create a new repository
- Add an organization
- Create backup jobs for the organization assigned to the new proxy and repository
Creating a proxy
A proxy within VBO is responsible for data transfer towards the repository. By default, the VBO server itself is both a proxy as a repository but it is a common practice to disable this and leverage additional proxies. If you are going to provide Backup as a Service for your customers, this is a vital part of your design. This will allow you as a Service Provider to scale-out as you grow.
To create an additional proxy we will leverage a POST request against “/v2/Proxies” which requires a JSON parameter. There are a few important settings here. These are always required and should be filled in.
- hostName: this will be the IP or FQDN of the new proxy being added
- description: this is a short description which can be anything to assist you later on with an audit
- port: the default port used for communication
- username: the username for the server (also used to perform the installation of the proxy service). It is important to leverage a double backslash as seen in the JSON above.
- password: the password of the dedicated username
The other options, as you can see in the JSON code below, are optional and are leveraged for more advanced deployments. This can be useful if you want to enable network throttling or increase the number of threads which can be opened towards Microsoft Office 365.
{
  "hostName": "proxyserver.domain.com",
  "description": "Extra proxy",
  "port": 9193,
  "username": "SERVER\\Administrator",
  "password": "CoolPa$s$w0rd",
  "attachUsedProxy": "true",
  "threadsNumber": 64,
  "enableNetworkthrottling": true,
  "throttlingValue": 2500,
  "throttlingUnit": "KBs"
 }
After clicking “Try it out!“, the proxy will be added and it will result in a 201 response code stating the proxy was created.
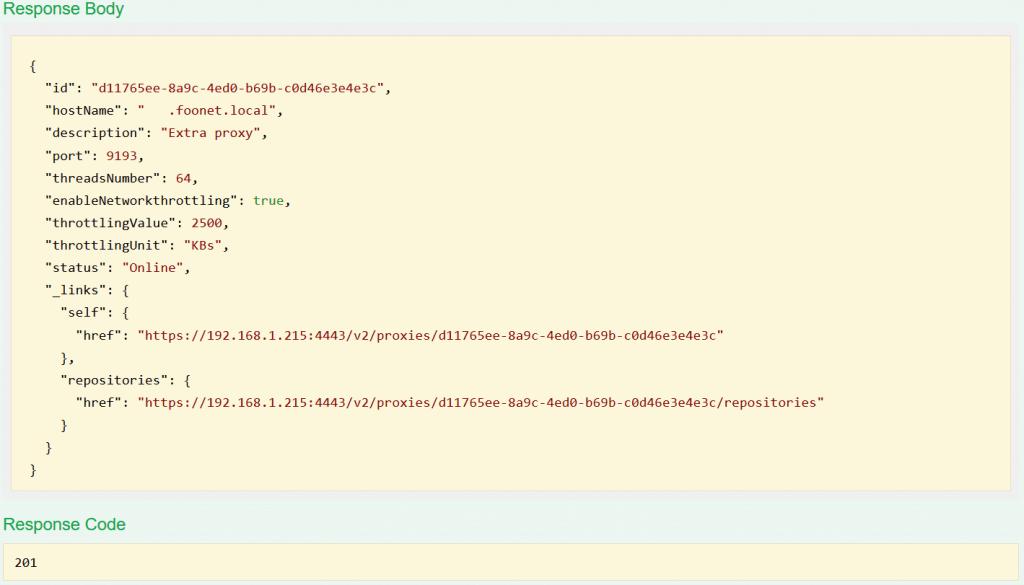
You will notice the response contains an ID. This is the proxy ID which we will use when adding the repository.
Creating a repository
After adding our new proxy, we can continue with adding a repository dedicated to this proxy. You will notice this part is just as easy as adding a new proxy.
To create a repository we will perform a POST request against “/v2/BackupRepositories” which also requires a JSON parameter. The JSON parameter can contain a lot of options based on your needs for the repository. This is mostly related to the retention and clean-up schedule. A full list is available in the user guide. In the example below, we will create a repository pointing to a specific folder (C:\Veeam\Repository) with a daily schedule for 14 days. This will store backups for 2 weeks. Additionally, we will run a weekend clean-up schedule at 8:00 on both Saturday and Sunday.
The JSON example below is one of many options available in the product. Important to understand is, when defining the path, to leverage a double backslash for pointing out to the directory. If you don’t use these, it will result in an error: “Object reference not set to an instance of an object.“.
{
  "name": "New Repository",
  "description": "Our new backup repository for VBO",
  "proxyId": "b71bc577-0a80-43e7-8a81-47798b25dba3",
  "retentionPeriodType": "Daily",
  "dailyRetentionPeriod": 14,
  "retentionFrequencyType": "Daily",
  "dailyTime": "08:00:00",
  "dailyType": "Weekends",
  "path": "C:\\Veeam\\Repository",
  "attachUsedRepository": "true"
}
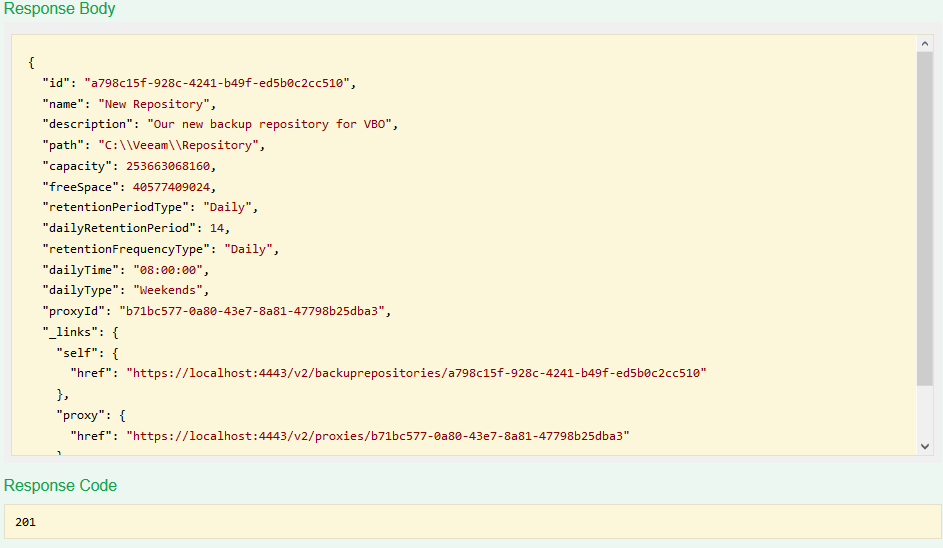
After clicking “Try it out!“, the repository will be added and it will result in a 201 response code. You will also notice, based upon the output, a new ID is available. This is the repository ID which will be used when creating the backup job later on.
Adding an organization
We got our dedicated proxy and repository
To add our organization we will perform a POST request against “/v2/Organizations” which requires a JSON parameter. Based upon the organization being added you can change the region (VBO supports Worldwide, Germany, China and
{
  "Username": "username@domain.onmicrosoft.com",
  "Password": "CoolPa$$word",
  "Type": "Office365",
  "Region": "Worldwide",
  "GrantImpersonation": true,
  "GrantAccessToSiteCollections": true,
  "UseVeeamAADApplication": true
}
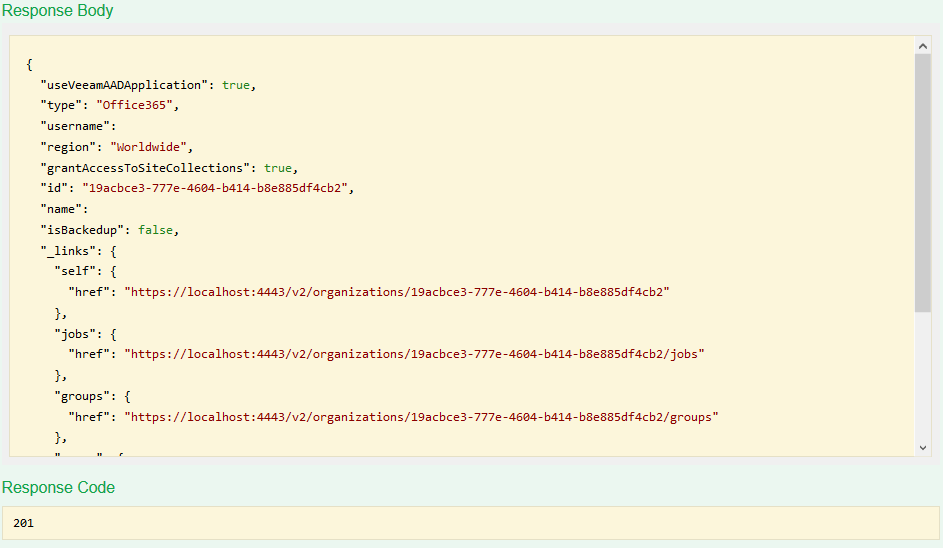
After clicking “Try it out!“, the organization will be added and it will result in a 201 response code. You will also notice, based upon the output, a new ID is available. This is the organization ID which will be the final ID used when creating the backup job in the next step.
We can now start creating backup jobs for the specific organization. We will make 2 different jobs as an example. A simple backup job which backs up everything within the organization and a second, more advanced, job which backs up only OneDrive for Business
Creating a simple backup job
Before you can create the backup job, you will need the 2 IDs from the previous API requests:
- Organization ID
- Repository ID
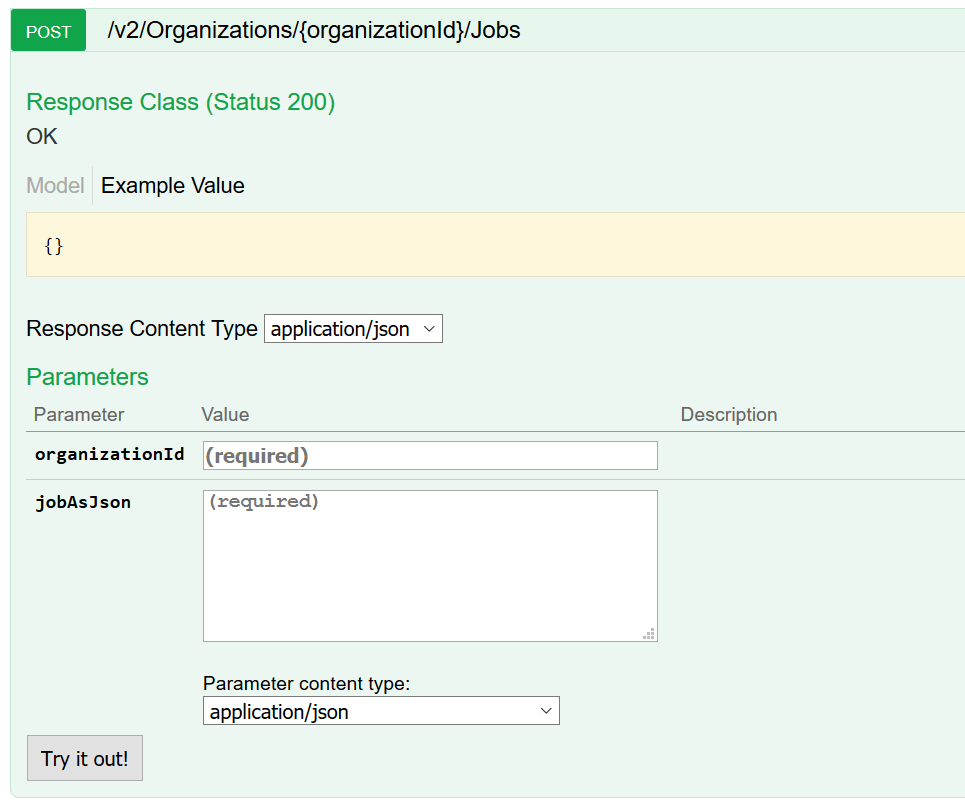
To create the all in one backup job we will do a POST request against “/Organizations/{organizationId}/Jobs” in which we will replace the ID with our Organization ID. Via Swagger we have the option to fill in the Organization ID as well as the required JSON parameter.
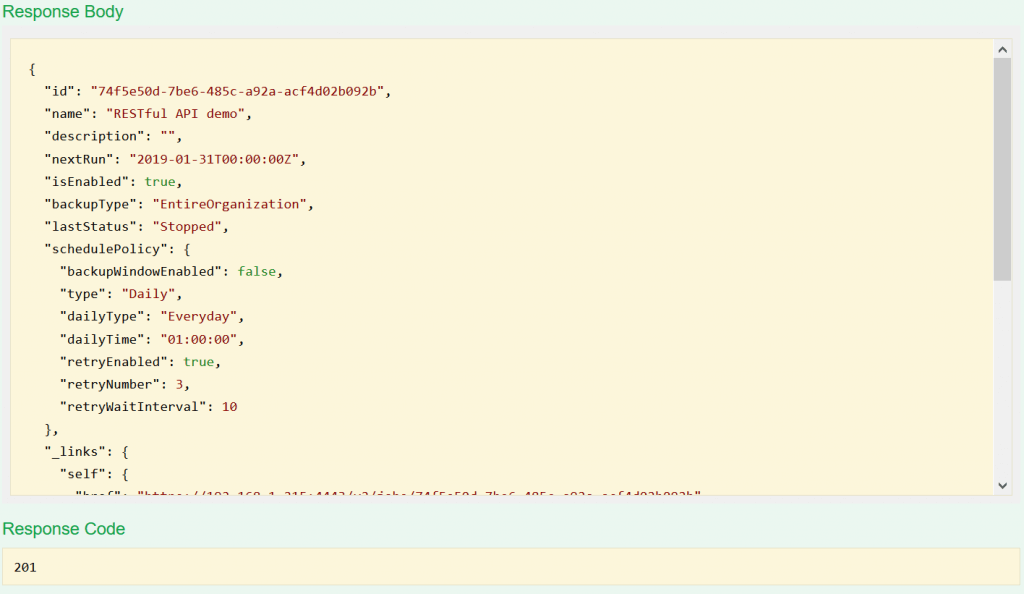
The basic job will be created by leveraging the JSON below. We will create a job called “RESTful demo” which will backup the entire organization (Exchange Online, SharePoint Online and OneDrive for Business). The job will be configured to run every day at 01:00 and in case of an error the job will retry again after 10 minutes up to 3 times. By using the option “
{
  "name": "RESTful API demo",
  "description": "RESTful API demo",
  "backupType": "EntireOrganization",
  "repositoryId": "a798c15f-928c-4241-b49f-ed5b0c2cc510",
  "isRun": true,
  "schedulePolicy": {
    "backupWindowEnabled": false,
    "type": "Daily",
    "dailyType": "Everyday",
    "dailyTime": "01:00:00",
    "retryEnabled": true,
    "retryNumber": 3,
    "retryWaitInterval": 10
  }
}
A final “Try it out!” click and the job will be created and it will again result in a 201 response code.
Creating a more advanced backup job
The following JSON will create a backup job which only backs up OneDrive for Business objects for the entire organization. The schedule is the same as the previous job as well as the retry options.
{
  "name": "Selected Items RESTful API demo",
  "description": "Selected Items RESTful API demo",
  "isEnabled": true,
  "backupType": "SelectedItems",
  "repositoryId": "a798c15f-928c-4241-b49f-ed5b0c2cc510",
  "SelectedItems":
  [
    {
      "Type": "PartialOrganization",
      "Mailbox": false,
      "ArchiveMailbox": false,
      "OneDrive": true,
      "Site": false
    },
  ],
  "schedulePolicy": {
    "backupWindowEnabled": false,
    "type": "Daily",
    "dailyType": "Everyday",
    "dailyTime": "01:00:00",
    "retryEnabled": true,
    "retryNumber": 3,
    "retryWaitInterval": 10
  }
}
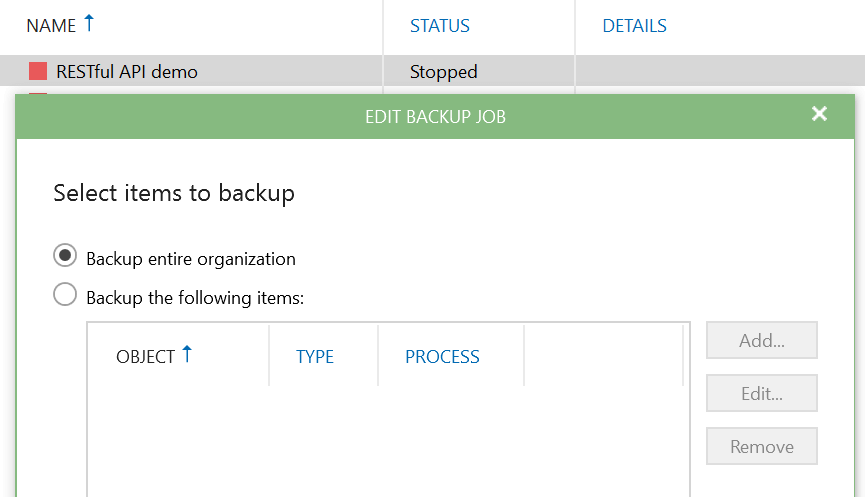
Upon successful creation, the job will again result in a 201 response code. By leveraging the VBO console, we can quickly see the difference in the jobs.

What about other options?
A backup job can have a lot of options. You can include and exclude specific items, you can make backup jobs based on the Office 365 service you want to backup,… A larger advanced example is available in the user guide, additionally, there is an explanation on every JSON parameter.
What’s next?
In the next part, we will take a look at job management. We will perform basic tasks such as starting and stopping jobs, going over the session log and modifying jobs.