Veeam Backup for Microsoft Office 365 RESTful API: Working with Object Storage
At the start of this year, I wrote several blog posts on getting started with the RESTful API for Veeam Backup for Microsoft Office 365. With the recently released version 4 and the introduction of Object Storage support, I decided to add another part explaining how you can manage Object Storage via the API.
Choosing your Object Storage provider
Version 4 added several new API options in regards to Object Storage:
- Account
- AmazonS3CompatibleObjectStorage
- AmazonS3ObjectStorage
- AzureObjectStorage
- EncryptionKey
- ObjectStorageRepository
We will take a closer look at each of these providers first and afterward jump in how we can extend a backup repository to send backup directly onto Object Storage.
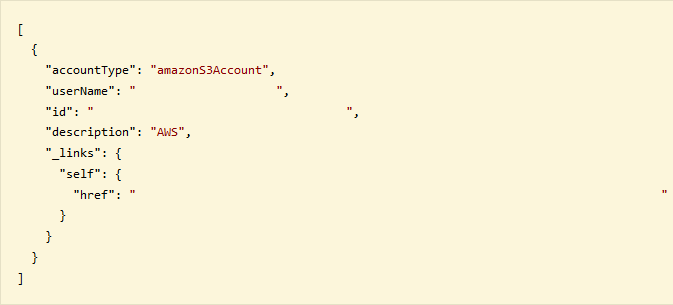
Before you can actually add Object Storage, you will first have to add the relevant account information. This can be done via a POST request to “/v4/Accounts“. Below is a JSON example for adding an Amazon S3 account.
{
  "accountType": "amazonS3Account",
  "username": "USERNAME",
  "password": "password",
  "description": "AWS account"
 }
The possible options for accountType are:
- Amazon AWS: amazonS3Account
- Amazon S3 Compatible: AmazonS3CompatibleAccount
- Azure Blob: azureBlobAccount
Once you have added the account, it will return an ID which we will need later on when adding our Object Storage.

The next step is adding the actual Object Storage. In the examples below, we will look at Amazon S3 and Azure Blob storage.
Adding Amazon S3 Object Storage
Based upon the ID from the corresponding account we can add the S3 Storage. This requires a bucket which you can create via the AWS console.
The JSON below contains an overview of all the required parameters. As you can see we define the bucket by its region type, name and id.
You can also specify a size limit on the bucket by changing “sizeLimitEnabled” to true. If you want to do this, you will have to add the parameter: ‘“sizeLimitGB”: 2000‘. This will enable a limit of 2000GB.
{
   "type": "AmazonS3",
   "name": "Amazon S3 Storage",
   "description": "Amazon S3 storage added via REST",
   "accountId": "XXXX-XXXX-XXXX-XXXX-XXXXXXXX",
   "bucket":    {
      "name": "foonet-restfulapitest",
      "regionType": "Global",
      "regionName": "EU (Frankfurt)",
      "regionId": "eu-central-1",
   },
   "s3Folder": "RESTStorageFolder",
   "sizeLimitEnabled": false,
 }
Adding Azure Blob Object Storage
If you want to add Azure Blob as a target, the JSON is slightly different.
{
     "azureFolder": "VBO365",
     "type": "AzureBlob",
"name": "Azure Blob",
"description": "Azure Blob storage added via REST",
"accountId": "XXXX-XXXX-XXXX-XXXX-XXXXXXXX", "azureContainer": {
"name": "veeam",
"regionType": "Global",
},
     "sizeLimitEnabled": false,
 }

Once you’ve added your Object Storage of choice to your infrastructure, we can use it with a backup repository. Do this, we require the Object Storage ID which will be shown in the outcome of the call.
Extending a new backup repository
In part 2 of my RESTful API series, we went over the creation of a backup repository. With the introduction of Object Storage support, we can now extend the JSON response. As mentioned before, we require the Object Storage ID to continue. For example, if you want to offload to Amazon S3, it looks like the example below.
{
     "objectStorageId": "objectStorageID",
     "objectStorageCachePath": "c:\awsRESTful",
     "objectStorageEncryptionEnabled": false,
     "name": "Backup repository with S3 Storage",
     "description": "Backup repository with Object Storage created via REST",
     "retentionType": "ItemLevel",
     "retentionPeriodType": "Yearly",
     "yearlyRetentionPeriod": "Years3",
     "retentionFrequencyType": "Daily",
     "dailyTime": "23:00:00",
     "dailyType": "Everyday",
     "proxyId": "proxyID",
 }
It is important here to note 3 parameters:
- objectStorageId which is the ID from the freshly attached Object Storage
- obejctStorageCachePath which is the folder on the local repository which will be leveraged as the persistent cache (and store metadata)
- objectStorageEncryptionEnabled which can be either true or false. This enables encryption of the backup data within the Object Storage.
By leveraging this example, we have now seen how to add Object Storage accounts and how to create a backup repository so we can send the data offsite.
Encryption
If you want to leverage encryption, you can create keys by performing a POST request against “/v4/EncryptionKeys“. The JSON is straight forward.
{
  "password": "myc00lpassword",
  "description": "AWS encryption"
}
Updating keys is also possible by using a KeyID and perform a PUT request against “/v4/EncryptionKeys/{KeyID}“.