
Veeam Backup for Microsoft Office 365: adding Auxiliary Backup Accounts via PowerShell
With the release of Veeam Backup for Microsoft Office 365 v4, a new feature was added to improve backing up SharePoint and OneDrive for Business data. By leveraging auxiliary backup accounts, it reduces the risk of throttling which Microsoft has in place. Throttling, however, happens on a per account base so leveraging multiple is a major improvement.
The normal workflow
The normal workflow to do this is quite simple and here is the short version of it:
- Go to your Office 365 admin center
- Create some users (veeambackup1@…, veeambackup2@…)
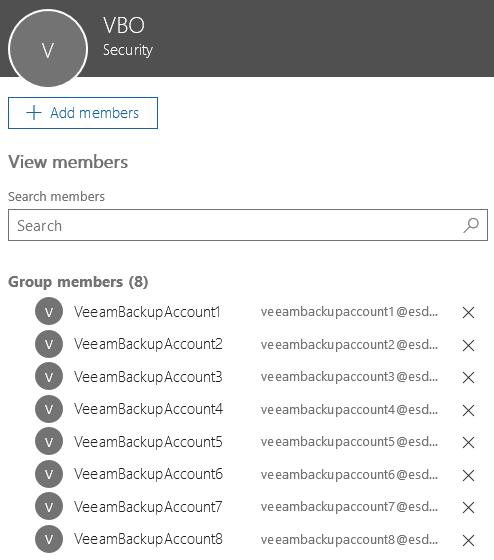
- Add these users to a security group
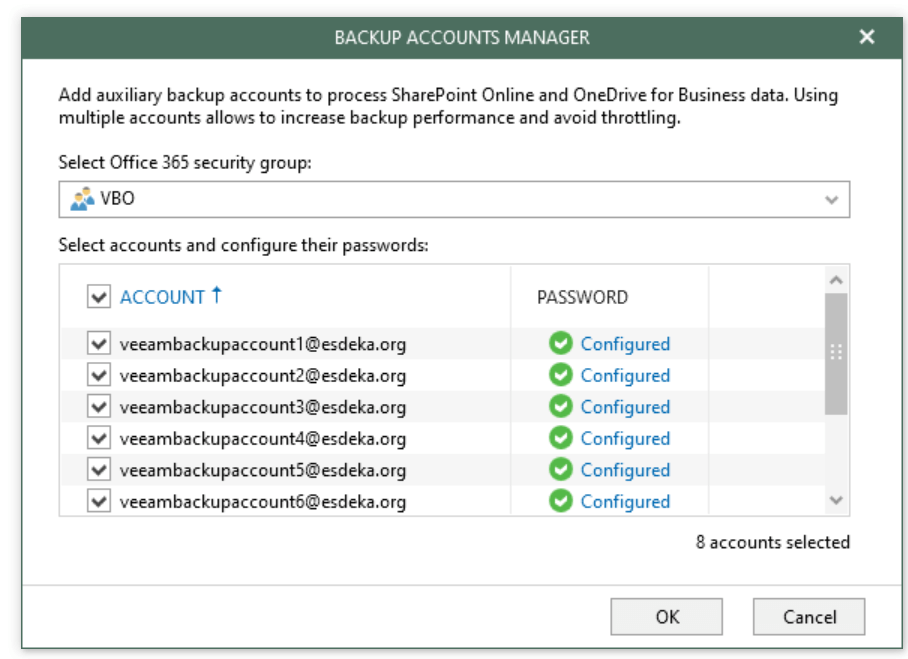
- Configure the backup accounts within Veeam Backup for Microsoft Office 365
The longer version is available in the user guide.
The best practice for this is to leverage accounts in bulk of 8 (so 8, 16, 24,… accounts). Doing all of the steps above requires you to create an account with a password, configure it in Veeam Backup for Microsoft Office 365 and rinse and repeat a few times. Wouldn’t it be great if this could go faster?
Hello PowerShell!
I like automating things and the above scenario is one of those that came up a few times as a request by Veeam customers and partners.
I’ve created a PowerShell script which does all of the above based upon some parameters. You can download it via GitHub.
The script will perform the following steps:
- Create a security group if needed
- Add accounts to your Office 365 subscription
- Add these accounts to the security group
- Configure accounts as backup accounts within Veeam Backup for Microsoft Office 365
There are a few parameters that can be changed which are listed below.
# Modify the values below to your needs
# Number of accounts to add - advised is to add in bulk of 8 accounts
[Int]$Accounts = 8

# Number to start from (change this if you are adding extra accounts)
[Int]$StartFrom = 1

# Display Name for the accounts (these will get a number at the end, eg VeeamBackupAccount1, VeeamBackupAccount2)
$DisplayName = "VeeamBackupAccount"

# Your domain name
$Domain = "yourdomain(.onmicrosoft).com"

# Your security group name
$SecurityGroup = "VBO"

# Organization name as configured in Veeam Backup for Microsoft Office 365
$OrganizationName = "yourdomain(.onmicrosoft).com"
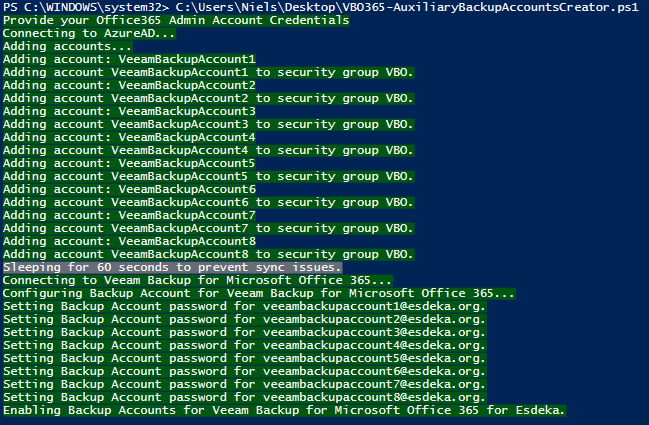
Once you execute this it will configure everything for you within Office 365 as you can see from the example below.
Found a bug or got feedback?
Please let me know if you found a bug so I can update where needed but as always any other feedback is also welcome.