
Veeam Backup for Microsoft Office 365 RESTful API: Authentication against MFA-enabled Organizations
In my previous post, I already explained how to add an MFA-enabled organization. When using MFA, it changes the authentication logic for a tenant using the RESTful API. There is already an example available in the user guide but I decided to create this blog post to complete the series but also provide some more details.
In part 1, I described how you can log in to the API as a VBO administrator and perform the tasks which are written within this series as well as insight on how to do it as a tenant. Since VBO now also supports MFA-enabled organizations besides basic (legacy) authentication, there are additional steps required before we can log in as a tenant.
As there is no Swagger for the following, I’m using Postman as a source for screenshots and output.
Hello Microsoft API’s
In order to log in to the VBO365 API, we require 2 things:
- client_id parameter which is the organization name in the *.onmicrosoft.com format
- assertion parameter which is a JSON response obtained from Microsoft API’s
Getting the assertion parameter
We’ll need to perform 3 steps to get the assertion parameter:
- Obtain a device code from Microsoft’s Graph API
- Verify the user code via aka.ms/devicelogin
- Get the assertion from Microsoft’s Graph API
Obtaining a device code
In order to get a device code, we’ll perform a POST request against “https://login.microsoftonline.com/<tenant>/oauth2/v2.0/devicecode“, where <tenant> is your organization name in *.onmicrosoft.com format.
We’ll have to pass the following parameters as the body:
- client_id: application ID as configured in your organization for VBO365 (can be found in Azure AD)
- scope:
- Directory: one of the following permissions: Directory.Read.All, Directory.ReadWrite.All or Directory.AccessAsUser.All
- User: one of the following permissions: User.Read, User.ReadWrite, User.ReadBasic.All, User.Read.All or User.ReadWrite.All
- offline_access
In the below example we use the following scope: Directory.AccessAsUser.All User.ReadWrite.All offline_access
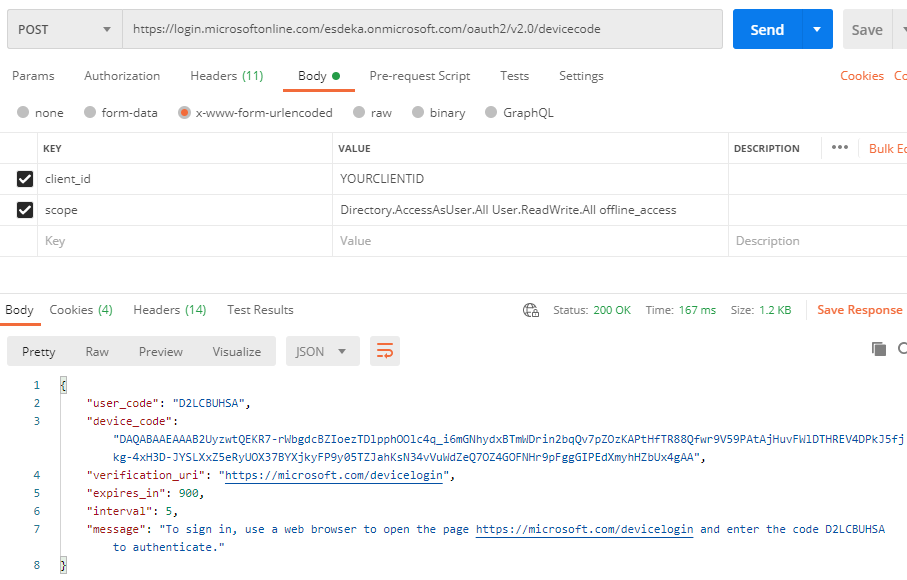
This will result in a response which contains both a user_code and a device_code.
Both of these will be needed in the next steps.
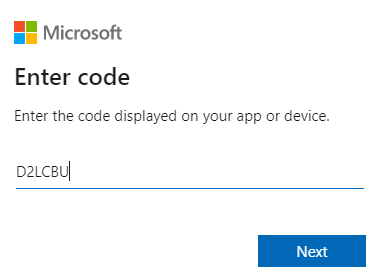
Verify the user code
The response will also send back a verification_uri, which we will go to. On this page, we’ll have to provide the user_code we received via the API request.
This will result in a request to sign in to your VBO365 configured application as can be seen on the example below.
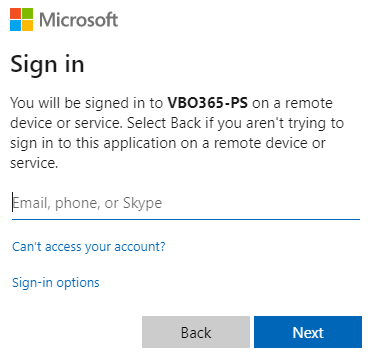
It will require an account with permissions and once you’ve done this, you will receive the following message.
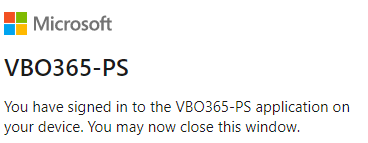
Now we can go to the final step and get the assertion via the Microsoft Graph API.
Get the assertion
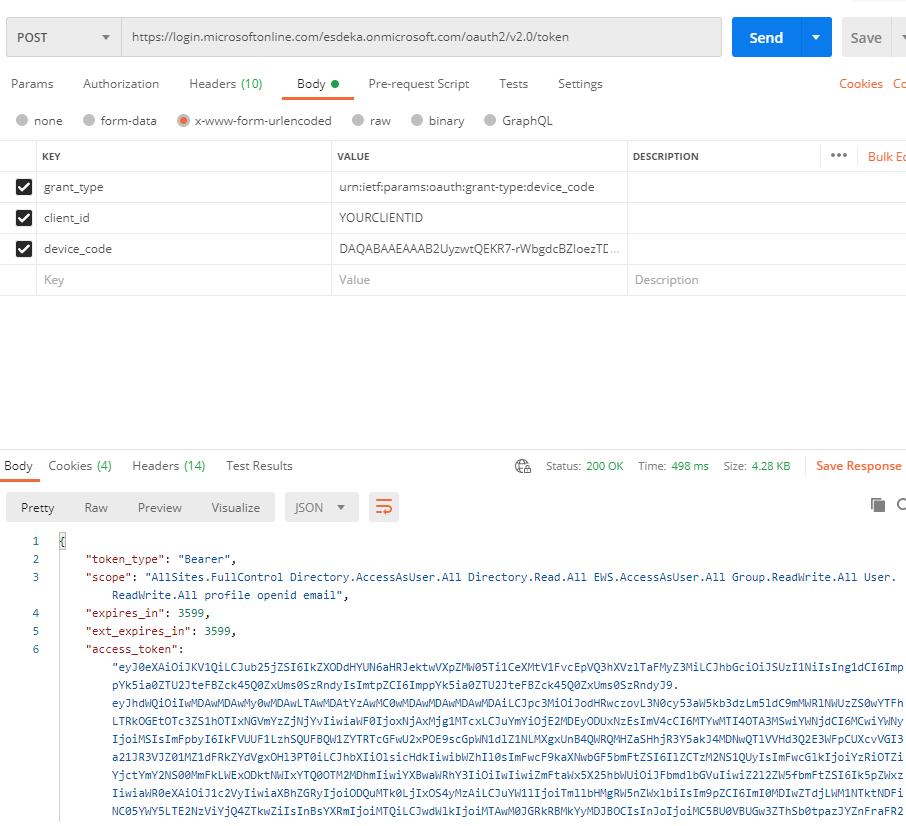
We’ll perform a POST request against “https://login.microsoftonline.com/<tenant>/oauth2/v2.0/token“, where <tenant> is your organization name in *.onmicrosoft.com format.
We’ll have to pass the following parameters as the body:
- grant_type: urn:ietf:params:oauth:grant-type:device_code
- client_id: application ID as configured in your organization for VBO365 (can be found in Azure AD)
- device_code: the device_code we obtained in step 1
This will result in a JSON output.
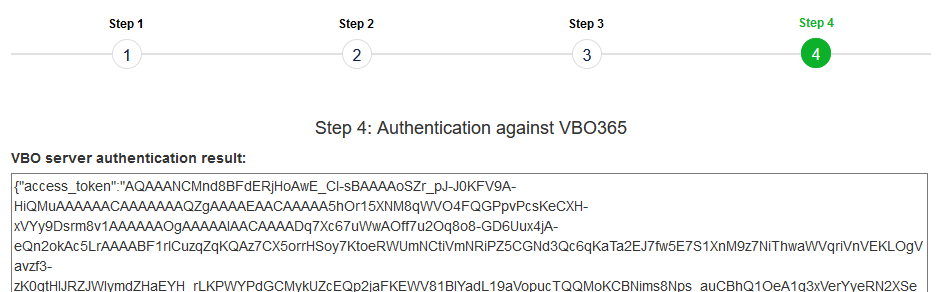
Authentication against VBO365
Now that we have the assertion and client_id, we can authenticate against VBO365 using a POST request against “/v4/token“.
We require the following parameters:
- client_id parameter which is the organization name in the *.onmicrosoft.com format
- assertion parameter which is the JSON response obtained in the previous step
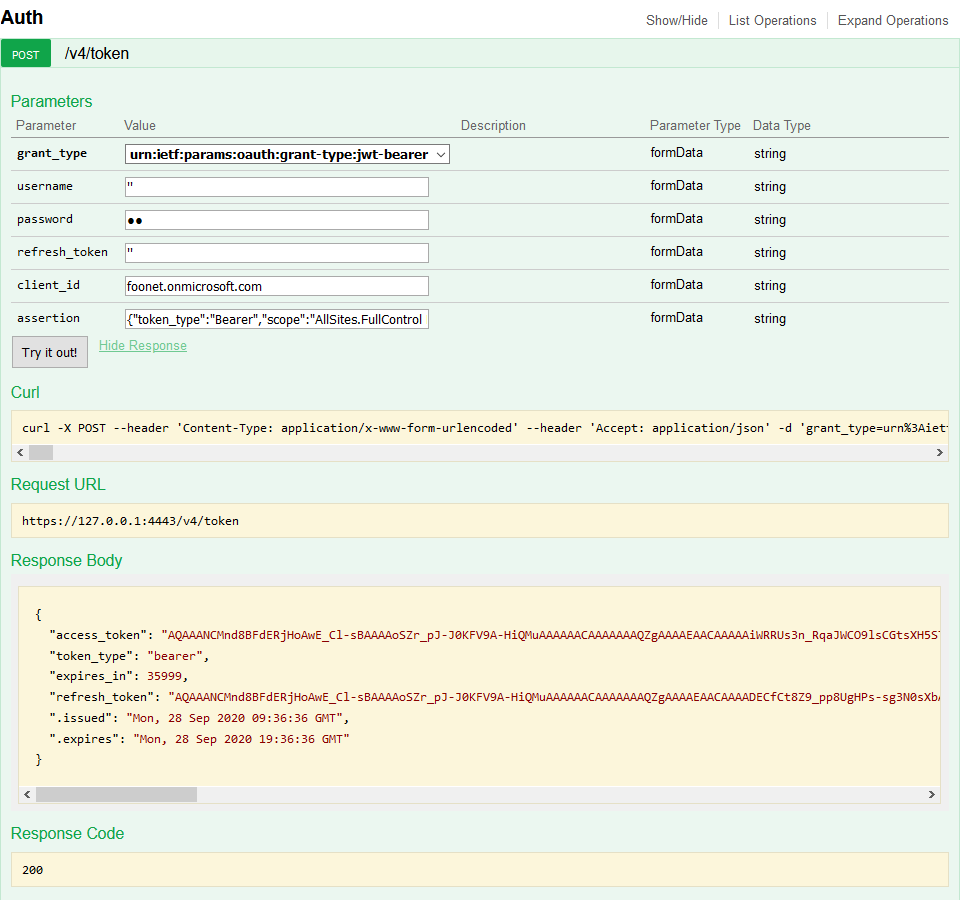
And that’s it, we are now authenticated as a tenant and can perform specific API requests against the tenant API endpoints.
We can, for example, get information on the organization by performing a GET against “/v4/Organization“.
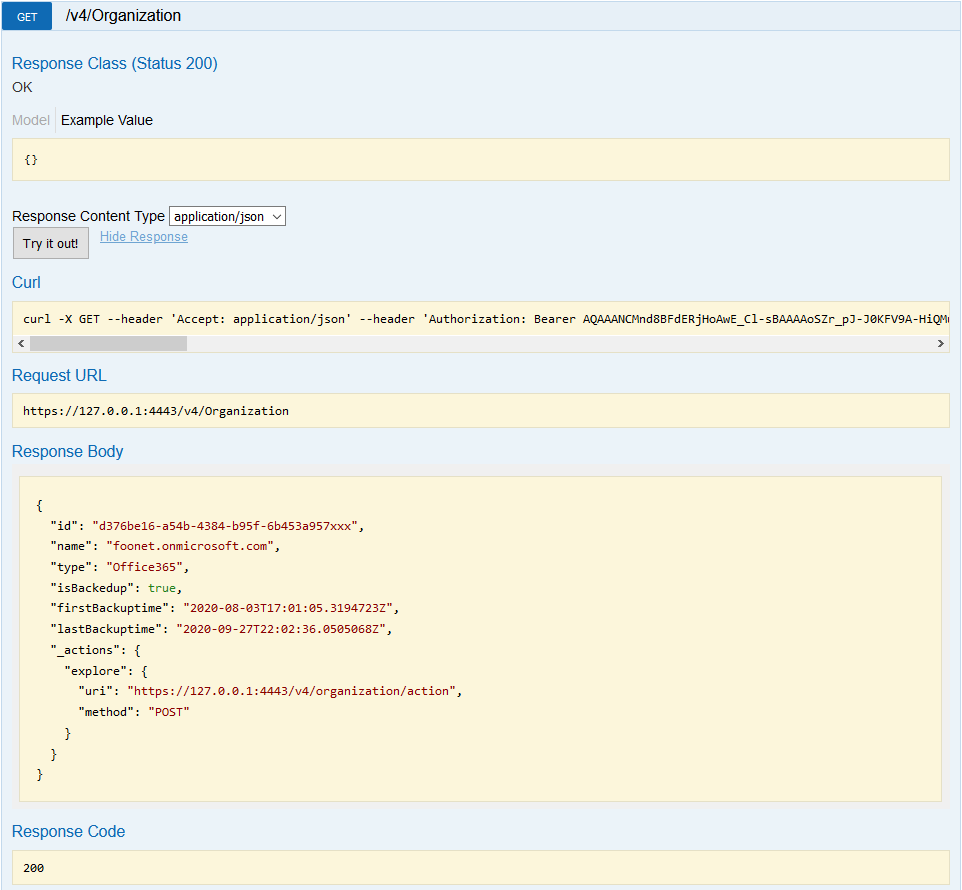
From here, we can also perform restore tasks:
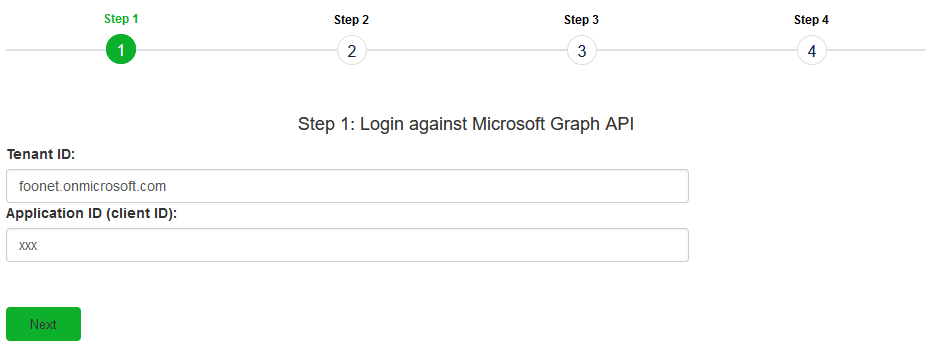
I’ve also made a small example that is written in HTML, PHP, and Javascript which performs the above 4 steps. Below are some screenshots of the first and last steps. The code is available via GitHub.
Got any more questions? Feel free to leave a comment or hit me up on Twitter.